Create a Load Balancer
- Go to the Load Balancers section.
- Click on Create Load Balancer.

Load Balancer Information
- Personal Area
- Openstack CLI
- Enter the name of the future load balancer in the Name Load Balancer field.

- You can specify an IP address in the IP address field.

- Add a description for the load balancer if needed.

- Choice Subnet.

- You can also change the activity status ("enabled" or "disabled") of the load balancer.
![]()
- Make sure you have filled in all the required fields, then click Continue.

Make sure the OpenStack client is installed and you can authenticate to use it. Execute the required commands.
openstack loadbalancer create --name <name> /
                              --description <description>
                              --vip-subnet-id <vip_subnet_id>
                              --enable | --disable
--name <name> - New load balancer name.
--description <description> - Set load balancer description.
--vip-subnet-id <vip_subnet_id> - Set subnet for the load balancer (name or ID).
--enable - Enable load balancer (default).
--disable - Disable load balancer.
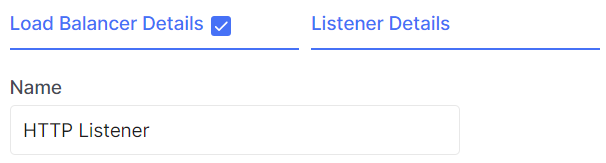
Listener Information
- Personal Area
- Openstack CLI
- Enter the name of the listener in the Name field.
- Describe the listener if necessary.

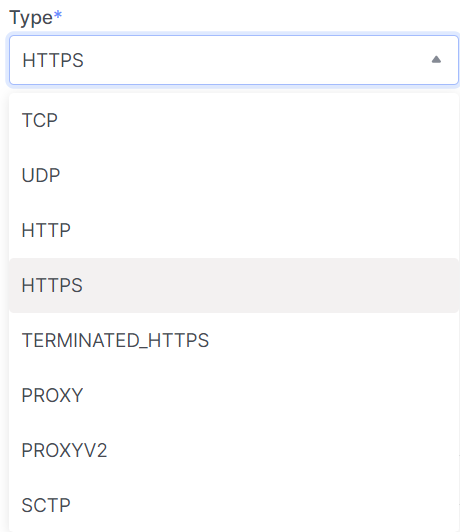
- Choose the protocol for listening and enter the port you plan to listen on.

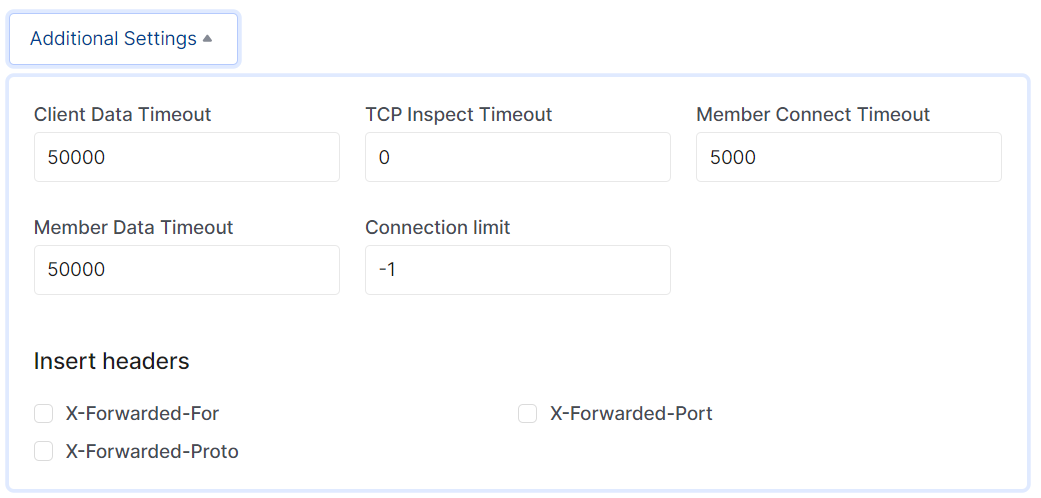
- You can also edit additional settings by clicking on Additional Settings and changing the provided data to what you need.
- Make sure you have filled in all the required fields, then click Continue.
Make sure the OpenStack client is installed and you can authenticate to use it. Execute the required commands.
openstack loadbalancer listener create
    --description <description> /
    --protocol {TCP,HTTP,HTTPS,TERMINATED_HTTPS} /
    --connection-limit <limit> /
    --default-pool <pool> /
    --default-tls-container-ref <container-ref> /
    --sni-container-refs [<container-ref> [<container-ref> ...]] /
    --insert-headers <header=value,...> /
    --protocol-port <port> /
    --enable | --disable /
    <load_balancer>
--name <name> - Set listener name.
--description <description> - Set the description of this listener.
--protocol {TCP,HTTP,HTTPS,TERMINATED_HTTPS} - The protocol for the listener.
--connection-limit <limit> - The maximum number of connections permitted for this listener.
--default-pool <pool> - The name or ID of the pool used by the listener if no L7 policies match.
--default-tls-container-ref <container-ref> - The URI to the key manager service secrets container containing the certificate and key for TERMINATED_TLS listeners.
--sni-container-refs [<container-ref> [<container-ref> ...]] - A list of URIs to the key manager service secrets containers containing the certificates and keys for TERMINATED_TLS the listener using Server Name Indication.
--insert-headers <header=value,...> - A dictionary of optional headers to insert into the request before it is sent to the backend member.
--protocol-port <port> - Set the protocol port number for the listener.
--enable - Enable listener (default).
--disable - Disable listener.
<load_balancer> - Load balancer for the listener (name or ID).
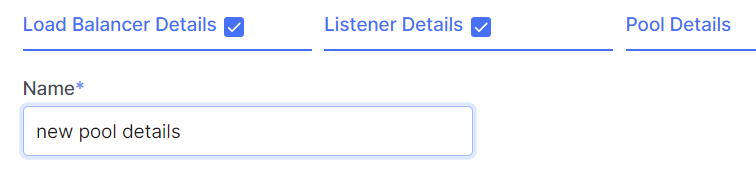
Pool Details
- Personal Area
- Openstack CLI
- Enter the name of the pool.
- If needed, add a description for your pool.

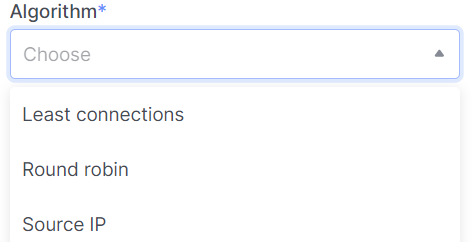
- Choose an algorithm for load distribution.
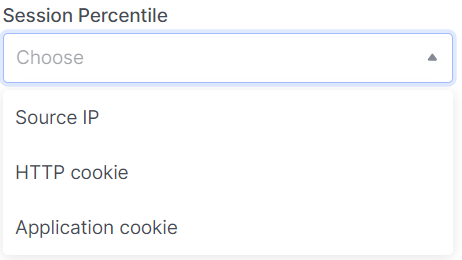
- Complete the data for load distribution settings in the Session Precentile field.
- You can also change the activity status ("enabled" or "disabled") of the pool.

Make sure the OpenStack client is installed and you can authenticate to use it. Execute the required commands.
openstack loadbalancer pool create
    --name <name> /
    --description <description> /
    --protocol {TCP,HTTP,HTTPS,TERMINATED_HTTPS,PROXY} /
    --listener <listener> /
    --loadbalancer <load_balancer> /
    --session-persistence <session persistence> /
    --lb-algorithm {SOURCE_IP,ROUND_ROBIN,LEAST_CONNECTIONS} /
    --enable | --disable /
--name <name> - Set pool name.
--description <description> - Set pool description.
--protocol {TCP,HTTP,HTTPS,TERMINATED_HTTPS,PROXY} - Set the pool protocol.
--listener <listener> - Listener to add the pool to (name or ID).
--loadbalancer <load_balancer> - Load balancer to add the pool to (name or ID).
--session-persistence <session persistence> - Set the session persistence for the listener (key=value).
--lb-algorithm {SOURCE_IP,ROUND_ROBIN,LEAST_CONNECTIONS} - Load balancing algorithm to use.
--enable - Enable pool (default).
--disable - Disable pool.
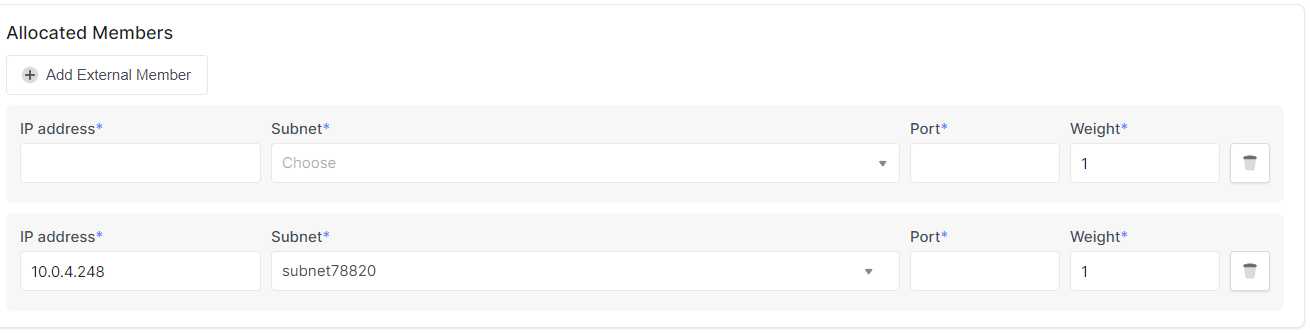
Pool Members
- Personal Area
- Openstack CLI
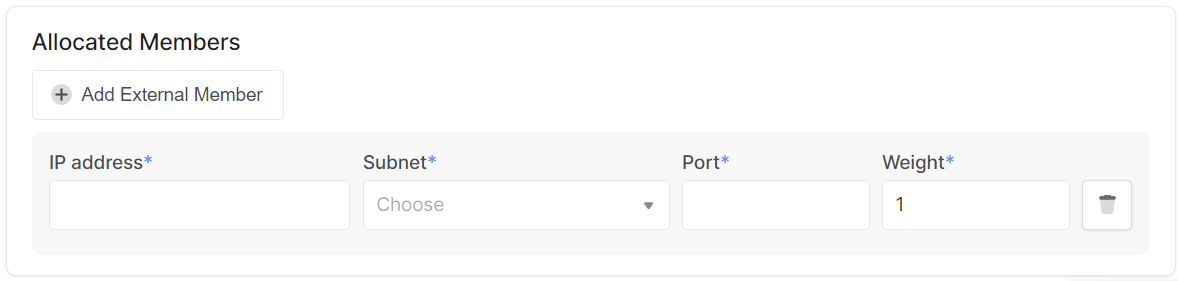
You can add pool members manually by click Add External Member and filling in all the required fields.
You can also add your instances as pool members.
1.) Click on Add Existing Instances
2.) From the listed instances, select the one you need and click Add in that instance's field.
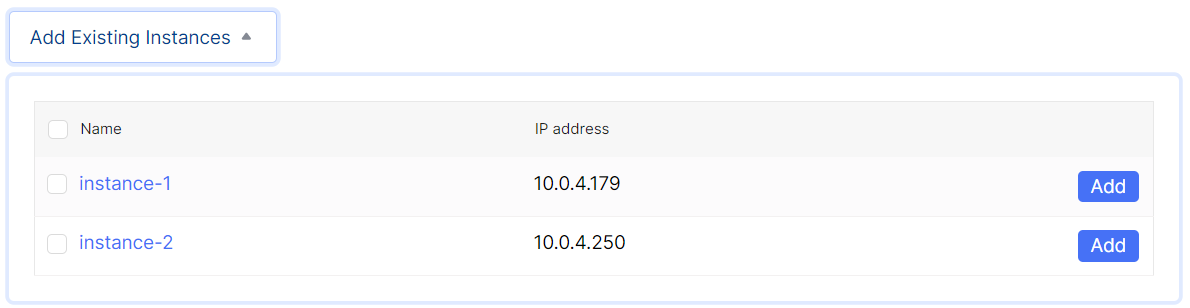 3.) Fill in the remaining fields.
Make sure the OpenStack client is installed and you can authenticate to use it. Execute the required commands.
openstack loadbalancer member create --name <name>
                                     --weight <weight>
                                     --address <ip_address>
                                     --subnet-id <subnet_id>
                                     --protocol-port <protocol_port>
                                     --monitor-port <monitor_port>
                                     --monitor-address <monitor_address>
                                     --enable | --disable
                                     <pool>
--name <name> - Set the name of the member.
--weight <weight> - The weight of a member determines the portion of requests or connections it services compared to the other members of the pool.
--address <ip_address> - The IP address of the backend member server.
--subnet-id <subnet_id> - The subnet ID the member service is accessible from.
--protocol-port <protocol_port> - The protocol port number the backend member server is listening on.
--monitor-port <monitor_port> - An alternate protocol port used for health monitoring a backend member.
--monitor-address <monitor_address> - An alternate IP address used for health monitoring a backend member.
--enable - Enable member (default).
--disable - Disable member.
<pool> - ID or name of the pool to create the member for.
Detailed Monitoring
- Personal Area
- Openstack CLI
Enter the name of the detailed monitoring settings in the Name field.

Choose the protocol in the Type field.
If necessary, fill in additional fields related to the protocol, in our case, the request method in the HTTP method field.

Select the correct response code.

Correct the URL to be monitored.

Specify the maximum allowed check errors before changing the member's operational status to ERROR and set the timeout.

The number of successful checks before changing the member's operational status to ONLINE and the delay between requests.

You can also change the activity status ("enabled" or "disabled") of monitoring.

Make sure the OpenStack client is installed and you can authenticate to use it. Execute the required commands.
openstack loadbalancer healthmonitor create
    --name <name>
    --delay <delay>
    --expected-codes <codes>
    --http_method {GET,POST,DELETE,PUT,HEAD,OPTIONS,PATCH,CONNECT,TRACE}
    --timeout <timeout>
    --max-retries <max_retries>
    --url-path <url_path>
    --type {PING,HTTP,TCP,HTTPS,TLS-HELLO}
    --max-retries-down <max_retries_down>
    --enable | --disable
    <pool>
--name <name> - Set the health monitor name.
--delay <delay> - Set the time in seconds, between sending probes to members.
--expected-codes <codes> - Set the list of HTTP status codes expected in response from the member to declare it healthy.
--http_method {GET,POST,DELETE,PUT,HEAD,OPTIONS,PATCH,CONNECT,TRACE} - Set the HTTP method that the health monitor uses for requests.
--timeout <timeout> - Set the maximum time, in seconds, that a monitor waits to connect before it times out. This value must be less than the delay value.
--max-retries <max_retries> - The number of successful checks before changing the operating status of the member to ONLINE.
--url-path <url_path> - Set the HTTP URL path of the request sent by the monitor to test the health of a backend member.
--type {PING,HTTP,TCP,HTTPS,TLS-HELLO} - Set the type of health monitor.
--max-retries-down <max_retries_down> - Set the number of allowed check failures before changing the operating status of the member to ERROR.
--enable - Enable health monitor (default).
--disable - Disable health monitor.
<pool> - Set the pool for the health monitor (name or ID).
Create a New Load Balancer
The image shows an example of how the summary of your settings will be displayed.
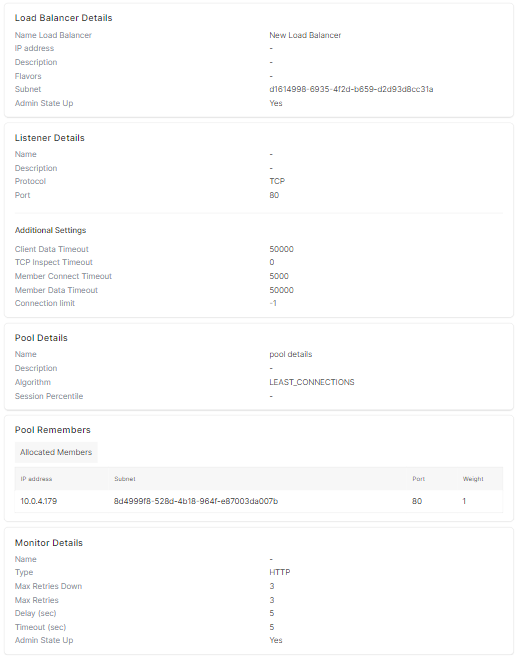
Click Create
